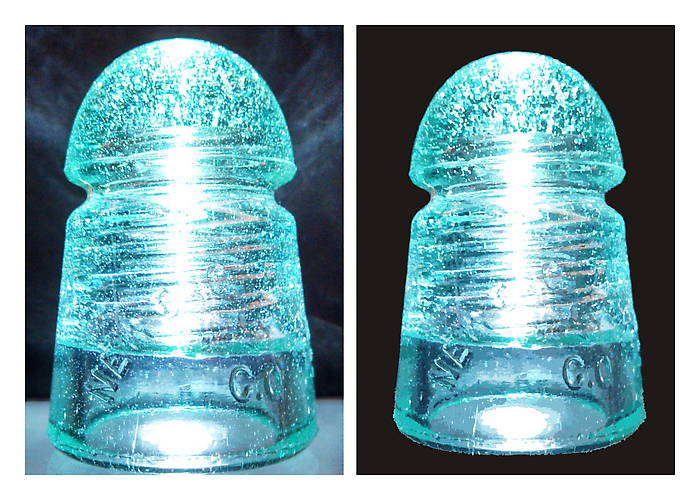
Here's the unedited picture of the insulator, side-by-side with the digitally edited pictured, which was originally seen at [id=383239574] . It's interesting to contrast the original picture with the digitally edited one. This mostly repeats the description from the earlier picture. If you use "View Original" and look at the right-hand image, you can see all the "patches" of identical color that were generated by the digital tracing process. Read on if you are suffering from insomnia. The details: I manipulated the picture digitally after I took it, which increased the apparent graininess but made it easy to replace the nearly black background with a solid black one. Here's what I did. I put the insulator on a clear glass shelf in my display case and under-lit it with a very intense Streamlight LED flashlight. I put a solid black cloth behind it as a backdrop. I photographed it with my phone camera in HDR mode. That probably cost me a significant amount of dynamic range, versus my Nikon in RAW mode. Then I used CorelTrace to convert the picture to a vector graphic - essentially a series of over 100,000 tiny patches, each representing an area of the same color. This made it fairly easy to "punch out" the insulator from its background. The resulting insulator image contained 12,700 objects. Note: I also tried the "Advanced Trace" option, which resulted in over 300,000 patches, and a file of over 90 Mbytes! Then I digitally placed a rectangle behind the insulator, filled with solid black. I think part of my problem with this method is too many lossy conversions. Every step that involved a conversion to JPG (original picture, plus Corel vector image to JPG) causes loss of quality. In addition the "Trace" probably made some decisions about merging adjacent areas of nearly the same color, in order to keep the number of patches smaller. All of this contributes to loss of fidelity and adds digital noise to the final image. When I do this again, I will take the picture in RAW mode, do a lossless conversion to some format that CorelTrace supports, and work with that. |